genesis脚本_Genesis Framework插件可增强您的WordPress网站
genesis脚本
Whether you’re a beginner or an expert, you’ve most likely come across StudioPress’ masterpiece, the Genesis Framework. This popular WordPress framework is well known for providing a secure foundation for high quality WordPress websites that are easy to setup (and maintain), and also SEO friendly.
无论您是初学者还是专家,您都很有可能会遇到StudioPress的杰作Genesis Framework。 这个流行的WordPress框架以提供易于安装(和维护)且SEO友好的高质量WordPress网站的安全基础而闻名。

Given it’s such a popular framework, there are a variety of plugins that have been built to extend upon Genesis. In this article, I’ll share some of the most popular Genesis plugins available.
鉴于它是一个如此流行的框架,因此已经构建了多种插件来扩展Genesis。 在本文中,我将分享一些最流行的Genesis插件。
As always, try to be selective in what plugins you install to keep your site lean, just focus on features that you actually need.
与往常一样,尝试选择安装哪些插件以保持网站精简,只关注您实际需要的功能。
创世纪响应滑块 (Genesis Responsive Slider)
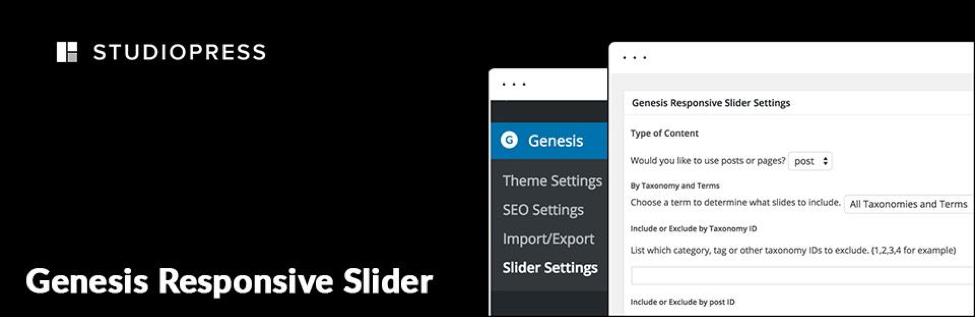
Genesis Responsive Slider is an excellent slider that solves the problem of no default dedicated slider. The plugin allows you to display a slideshow of the featured posts. The slideshow includes the posts’ title, excerpt, and the featured image. The slider is responsive and adjusts automatically to the target screen sizes.
Genesis Responsive Slider是出色的滑块,解决了没有默认专用滑块的问题。 该插件可让您显示精选帖子的幻灯片显示。 幻灯片显示了帖子的标题,摘录和精选图片。 滑块是响应式的,并会自动调整为目标屏幕尺寸。
WordPress version required: 3.2 or higher Compatible up to version: 4.3.6 Active Installs: 80,000+
所需的WordPress版本: 3.2或更高版本兼容的最高版本: 4.3.6 主动安装: 80,000+
主要特点: (Key Features:)
- Responsive slider and automatic adjustment according to screen size.响应滑块和根据屏幕尺寸自动调整。
- Drag-and-drop option to place the slideshow in the widget area.拖放选项可将幻灯片放到小部件区域。
- Choose desired dimensions for the slideshow of the posts.为帖子的幻灯片选择所需的尺寸。
- Set how the slideshow will look and function. 设置幻灯片的外观和功能。
- Using the post IDs, you can feature custom posts on the slider.使用帖子ID,可以在滑块上添加自定义帖子。
快速教程和安装指南: (Quick Tutorial & Installation Guide:)
手动程序: (Manual Procedure:)
- Open /wp-content/plugins/ directory and upload the folder genesis-responsive-slider there.打开/ wp-content / plugins /目录,然后将文件夹genesis-sensitive-slider上载到该目录。
- Make sure that you don’t change the folder’s name.确保不更改文件夹的名称。
- Go to the Plugins menu in WordPress Admin Dashboard and activate the plugin.转到WordPress管理控制台中的“插件”菜单,然后激活插件。
通过WordPress安装: (Install via WordPress:)
- Dashboard > Plugin > Add New.资讯主页>外挂程式>新增。
- Search for Genesis Responsive Slider Plugin.搜索Genesis Responsive Slider插件。
- Install and activate it.安装并激活它。
- Go to the Slider Setting from Genesis > Slider Settings.从“创世纪”>“滑块设置”转到“滑块设置”。
- Configure the responsive slider and tweak its settings.配置响应滑块并调整其设置。
- To add the slider, go to the widget area, find the Responsive slider from the left widget screen. Once located, drag-and-drop the Genesis Responsive Slider to the desired location.要添加滑块,请转到小部件区域,从左侧小部件屏幕中找到“响应式”滑块。 找到后,将“ Genesis Responsive Slider”拖放到所需位置。
More details and download: (https://wordpress.org/plugins/genesis-responsive-slider/)
更多详细信息和下载: ( https://wordpress.org/plugins/genesis-sensitive-slider/ )
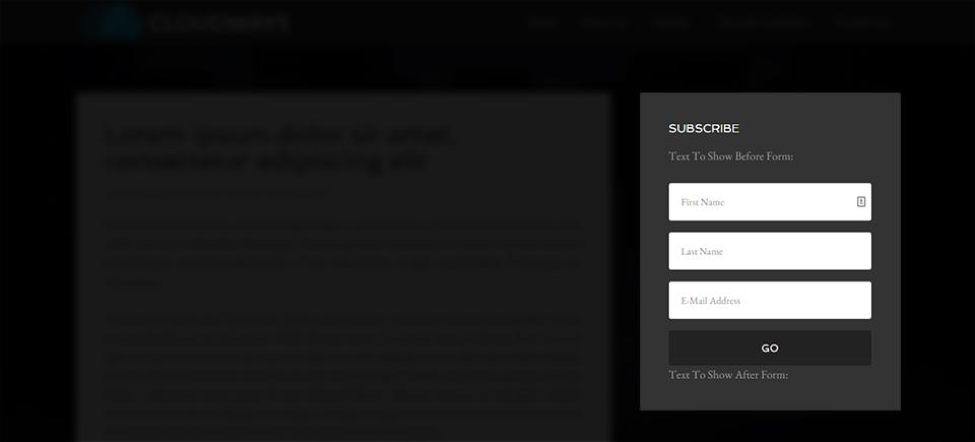
创世纪电子新闻扩展 (Genesis eNews Extended)
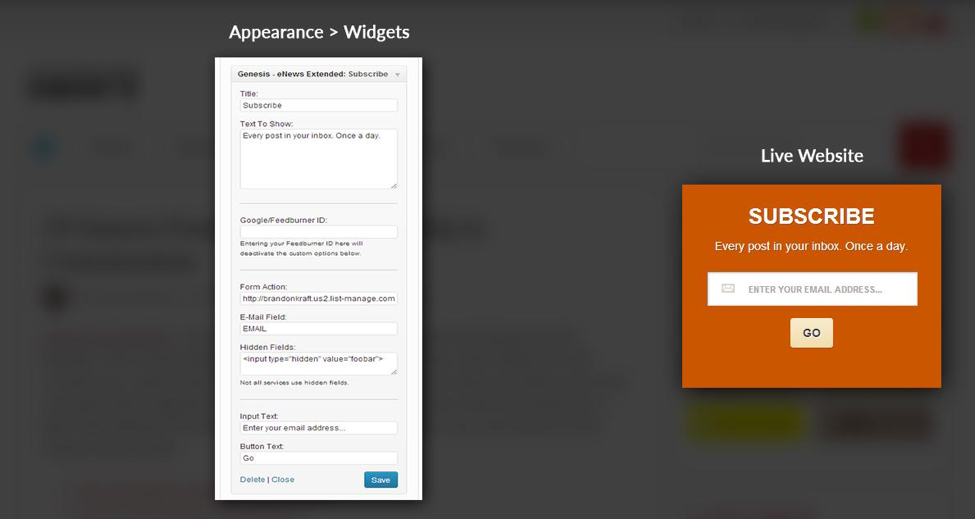
Genesis eNews Extended is a simple, third-party plugin, which greatly extends the capabilities of the Genesis framework. Although it was removed in version 2.0, it’s still compatible with all the later versions. The plugin creates a widget, which integrates with mailing list service providers such as FeedBlitz, FeedBurner, Aweber, MailChimp, and several others. It’s quite easy to use. All you have to do is to select the service provider, enter the user credentials, and you’re all set.
Genesis eNews Extended是一个简单的第三方插件,极大地扩展了Genesis框架的功能。 尽管已在2.0版中将其删除,但仍与所有更高版本兼容。 该插件创建了一个小部件,该小部件与邮件列表服务提供商(例如FeedBlitz,FeedBurner,Aweber,MailChimp等)集成在一起。 它很容易使用。 您所要做的就是选择服务提供商,输入用户凭据,一切就绪。
WordPress version required: 3.0 or higher Compatible up to version: 4.7Active Installs: 90,000+
所需WordPress版本: 3.0或更高版本兼容: 4.7 主动安装: 90,000+
主要特点: (Key Features:)
- Easy integration with popular mailing list providers.与流行的邮件列表提供商轻松集成。
- Customise the subscription box through additional configuration options.通过其他配置选项自定义订阅框。
- Improved features and functionality as compared to the previous ‘Genesis eNews’ version.与以前的“ Genesis eNews”版本相比,功能和功能有所改进。
快速教程和安装指南: (Quick Tutorial & Installation Guide:)
手动程序: (Manual Procedure:)
- Open /wp-content/plugins/ directory and upload the folder Genesis eNews Extended there.打开/ wp-content / plugins /目录,然后在此处上传文件夹Genesis eNews Extended。
- Make sure that you don’t change the folder’s name. 确保不更改文件夹的名称。
- Go to the Plugins menu in WordPress and activate the plugin.转到WordPress中的“插件”菜单并激活插件。
通过WordPress安装: (Install via WordPress:)
- Dashboard > Plugin > Add New.资讯主页>外挂程式>新增。
- Search for Genesis eNews Extended Plugin.搜索Genesis eNews扩展插件。
- Install and activate it.安装并激活它。
- To add the Subscription form, go to the widget area, find Genesis eNews Extended from the left widget screen. Once located, drag-and-drop it to the desired location.要添加订阅表单,请转到小部件区域,从左小部件屏幕中找到Genesis eNews Extended。 找到后,将其拖放到所需位置。
Using the Genesis eNews Extended plugin is a little tricky. When connecting the form with the mailing list provider, you need to use the form code given by the service provider to add the form field ID, form action URL etc. You can view a video example where I’m using MailChimp here.
使用Genesis eNews Extended插件有点棘手。 将表单与邮件列表提供商连接时,您需要使用服务提供商提供的表单代码来添加表单字段ID,表单操作URL等。 您可以在此处查看使用MailChimp的视频示例。
Once you have it setup, I strongly recommend that you do a test run to verify that it works correctly.
设置完成后,强烈建议您进行一次测试以验证其是否正常运行。
More details and download: (https://wordpress.org/plugins/genesis-enews-extended/)
更多详细信息和下载: ( https://wordpress.org/plugins/genesis-enews-extended/ )
WordPress响应式菜单 (WordPress Responsive Menu)
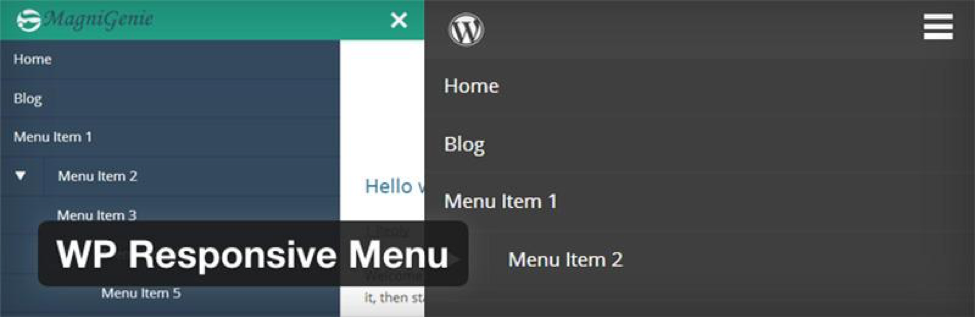
Integrating interactive and highly responsive navigation menus for mobile devices in Genesis-powered websites is best done through WP Responsive Menu. The plugin is based on Sidr jQuery menu plugin and packs numerous features, including customising menu colours and animations, adding logo to the menu, pinch zooming, swipe gestures, hiding specific menu items. The plugin also has a pro version that offers several additional features.
通过WP响应菜单,最好在Genesis支持的网站中为移动设备集成交互式且响应Swift的导航菜单。 该插件基于Sidr jQuery菜单插件,并包含许多功能,包括自定义菜单颜色和动画,向菜单添加徽标,捏缩放,滑动手势,隐藏特定菜单项。 该插件还有一个专业版,提供了几个附加功能。
WordPress version required: 3.5.0 or higher Compatible up to version: 4.5.4Active Installs: 60,000+
所需的WordPress版本: 3.5.0或更高版本兼容: 4.5.4 主动安装: 60,000+
主要特点: (Key Features:)
- The option to enable/disable pinch zooming feature.启用/禁用收缩缩放功能的选项。
- The Admin interface is extremely user-friendly and makes customising the menus a breeze.Admin界面非常友好,使自定义菜单变得轻而易举。
- Add logo, colours, animations, and other appealing features to the menu to match the website’s theme.在菜单中添加徽标,颜色,动画和其他吸引人的功能,以匹配网站的主题。
- Open menu however you like, i.e. from right, left, and top.打开菜单,但是您喜欢,即从右,左和顶部。
- Easy integration with the WordPress menu system.易于与WordPress菜单系统集成。
- Discard/hide unwanted features or elements on handheld devices.丢弃/隐藏手持设备上不需要的功能或元素。
- Add a custom search bar and alter its text to match the font and colour scheme of the overall menu.添加一个自定义搜索栏并更改其文本以匹配整个菜单的字体和配色方案。
快速教程和安装指南: (Quick Tutorial & Installation Guide:)
手动程序: (Manual Procedure:)
- Open /wp-content/plugins/ directory and upload the folder there.打开/ wp-content / plugins /目录,然后将文件夹上传到该目录。
- Make sure that you don’t change the folder’s name.确保不更改文件夹的名称。
- Go to the Plugins menu in WordPress and activate the plugin.转到WordPress中的“插件”菜单并激活插件。
通过WordPress安装: (Install via WordPress:)
- Dashboard > Plugin > Add New.资讯主页>外挂程式>新增。
- Search for WordPress Responsive Menu in the search bar.在搜索栏中搜索WordPress响应菜单。
- Install and activate it.安装并激活它。
- Once it’s installed, you’ll see the plugin in the left navigation bar of WordPress Dashboard.安装完成后,您将在WordPress仪表板的左侧导航栏中看到该插件。
More details and download: (https://wordpress.org/plugins/wp-responsive-menu/)
更多详细信息和下载: ( https://wordpress.org/plugins/wp-sensitive-menu/ )
创世纪简单钩 (Genesis Simple Hooks)
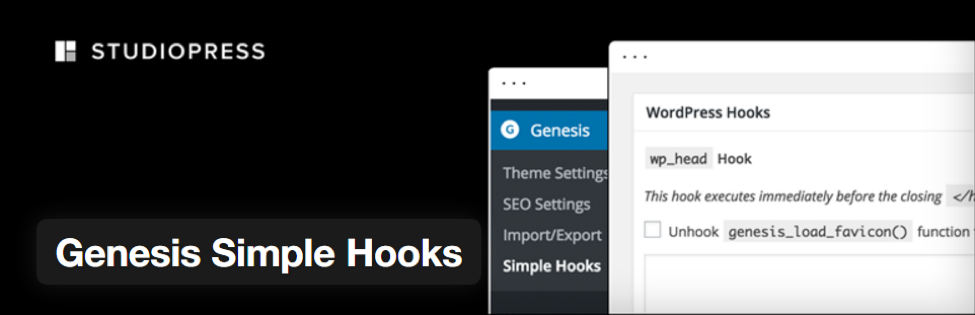
Genesis Simple Hooks is a cutting-edge plugin that allows developers to access both WordPress and Genesis hooks. When you install the plugin, a new setting page is created in the website’s dashboard, right below the framework’s menu. You can determine the content and the appropriate hook by accessing this page. You could insert content into the hooks without having to make any custom functions.
Genesis Simple Hooks是一个前沿的插件,允许开发人员访问WordPress和Genesis钩子。 当您安装插件时,将在网站菜单中的框架菜单正下方创建一个新的设置页面。 您可以通过访问此页面来确定内容和适当的挂钩。 您可以将内容插入到挂钩中,而不必进行任何自定义功能。
WordPress version required: 3.9.2 or higher Compatible up to version: 4.3.6 Active Installs: 90,000+
要求的WordPress版本: 3.9.2或更高版本兼容: 4.3.6 主动安装: 90,000+
主要特点: (Key Features:)
- 50+ Genesis action hooks.50多个创世纪动作挂钩。
- Easy and simple interface to modify your current Genesis theme by making changes to the hook system.简单易用的界面通过更改挂钩系统来修改当前的Genesis主题。
- Get access to WordPress built-in and Genesis theme hooks.获取对WordPress内置和Genesis主题挂钩的访问。
快速教程和安装指南: (Quick Tutorial & Installation Guide:)
手动程序 (Manual Procedure)
- Open /wp-content/plugins/ directory and upload the contents of the Genesis-simple-hooks folder.打开/ wp-content / plugins /目录并上传Genesis-simple-hooks文件夹的内容。
- Make sure that you don’t change the folder’s name.确保不更改文件夹的名称。
- Go to the Plugins menu in WordPress to activate the plugin.转到WordPress中的“插件”菜单以激活插件。
- Find and select the hook that you want to use.查找并选择您要使用的挂钩。
- Now enter the code that needs to be executed for that hook.现在输入需要为该挂钩执行的代码。
- Select whether PHP and Shortcodes need to be executed on that hook.选择是否需要在该挂钩上执行PHP和Shortcodes。
- Save the changes and check if the changes are applied on the Genesis theme.保存更改,并检查更改是否应用于Genesis主题。
通过WordPress安装: (Install via WordPress:)
- Dashboard > Plugin > Add New.资讯主页>外挂程式>新增。
- Search for Genesis Simple Hooks in the search bar.在搜索栏中搜索“ Genesis Simple Hooks”。
- Install and activate it.安装并激活它。
- Once it’s installed, you’ll see the plugin in the left navigation bar of WordPress Dashboard and follow step 4 onwards above.安装完成后,您将在WordPress信息中心的左侧导航栏中看到该插件,然后执行上述第4步。
More details and downloads: (https://wordpress.org/plugins/genesis-simple-hooks/)
更多详细信息和下载: ( https://wordpress.org/plugins/genesis-simple-hooks/ )
创世纪简单分享 (Genesis Simple Share)
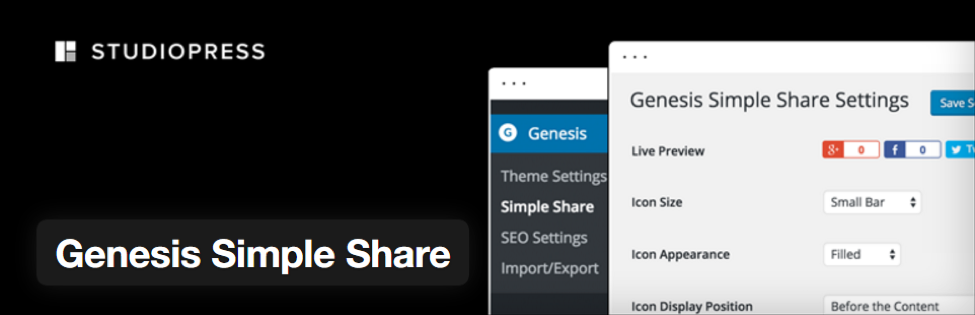
Social sharing icons are a common feature on many websites. If you have a Genesis-powered website, you can easily include social sharing buttons by installing this plugin. Genesis Simple Share is an official release from StudioPress, and offers several configuration options, enabling you to customise the look of social sharing icons for individual posts.
社交共享图标是许多网站上的常见功能。 如果您拥有基于Genesis的网站,则可以通过安装此插件轻松添加社交分享按钮。 Genesis Simple Share是StudioPress的正式版本,并提供多个配置选项,使您可以自定义各个帖子的社交共享图标外观。
WordPress version required: 3.7 or higher Compatible up to version: 4.6.1 Active Installs: 20,000+
所需的WordPress版本: 3.7或更高版本兼容: 4.6.1 主动安装: 20,000+
主要特点: (Key Features:)
- Change the order of social sharing icons through simple drag-and-drop.通过简单的拖放即可更改社交共享图标的顺序。
- Light and fast in performance.轻便,性能快。
- Choose the types of posts on which this plugin will be active.选择该插件将在其上活动的帖子类型。
- Special settings for Twitter that enable the user to put their username on the Twitter icon.Twitter的特殊设置,使用户可以将其用户名放在Twitter图标上。
快速教程和安装指南: (Quick Tutorial & Installation Guide:)
手动程序 (Manual Procedure)
- Download the Genesis Simple Share plugin.下载Genesis Simple Share插件。
- Go to your WordPress Dashboard and upload it as a new plugin. You can also upload this plugin through FTP to the wp-content/plugins folder. 转到您的WordPress仪表板并将其作为新插件上传。 您也可以通过FTP将该插件上传到wp-content / plugins文件夹。
- Activate the plugin.激活插件。
通过WordPress安装: (Install via WordPress:)
- Dashboard > Plugin > Add New.资讯主页>外挂程式>新增。
- Search for Genesis Simple Share in the search bar.在搜索栏中搜索“ Genesis Simple Share”。
- Install and activate it.安装并激活它。
- Once it’s installed, you’ll see the plugin in the left navigation bar of WordPress Dashboard.安装完成后,您将在WordPress仪表板的左侧导航栏中看到该插件。
More details and download: (https://wordpress.org/plugins/genesis-simple-share/)
更多详细信息和下载: ( https://wordpress.org/plugins/genesis-simple-share/ )
创世纪简单的编辑 (Genesis Simple Edits)
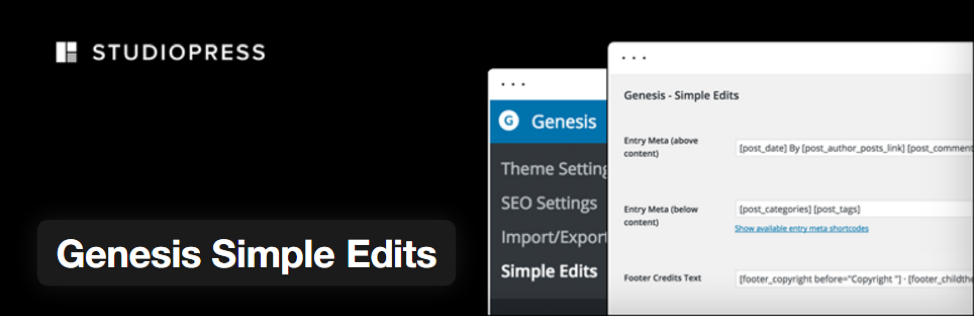
Whenever you set up a child theme on the parent install, you’ll notice that configurations about the post info, the footer area, and the post-meta are pre-set. The problem is that Genesis does not provide a way to modify these three areas as per the requirements of the individual posts.
每当在父安装上设置子主题时,您都会注意到有关发布信息,页脚区域和发布元的配置是预先设置的。 问题在于,Genesis没有提供根据单个职位的要求修改这三个区域的方法。
This is where Genesis Simple Edits comes in handy, as it allows you to edit and modify these areas very easily. You can edit the three fields by going to the admin screen and making changes to the HTML, Shortcodes, and the text in the text boxes.
这是Genesis Simple Edits派上用场的地方,因为它使您可以非常轻松地编辑和修改这些区域。 您可以通过进入管理屏幕并更改HTML,简码和文本框中的文本来编辑这三个字段。
WordPress version required: 3.2 or higher Compatible up to version: 4.3.6 Active Installs: 200,000+
所需的WordPress版本: 3.2或更高版本兼容: 4.3.6 主动安装: 200,000+
主要特点: (Key Features:)
- Free, lightweight and extremely simple to use.免费,轻巧且使用极为简单。
- Enables the user to quickly modify the footer, byline, and post meta information with custom details.使用户能够快速修改页脚,下划线并使用自定义详细信息发布元信息。
- Saves the hassle of writing PHP functions, tweaking the hooks, or using filters.节省了编写PHP函数,调整挂钩或使用过滤器的麻烦。
快速教程和安装指南: (Quick Tutorial & Installation Guide:)
手动程序 (Manual Procedure)
- Open /wp-content/plugins/ directory and upload the contents of the Genesis-simple-edits folder.打开/ wp-content / plugins /目录,然后上载Genesis-simple-edits文件夹的内容。
- Make sure that you don’t change the folder’s name. 确保不更改文件夹的名称。
- Go to the Plugins menu in WordPress to activate the plugin. 转到WordPress中的“插件”菜单以激活插件。
- Go to Genesis-> Simple Edits. 转到创世纪->简单编辑。
- Edit the three fields with custom information.使用自定义信息编辑三个字段。
- Save the changes.保存更改。
通过WordPress安装: (Install via WordPress:)
- Dashboard > Plugin > Add New.资讯主页>外挂程式>新增。
- Search for Genesis Simple Edits in the search bar.在搜索栏中搜索“ Genesis Simple Edits”。
- Install and activate it.安装并激活它。
- Once it’s installed, you’ll see the plugin in the left navigation bar of WordPress Dashboard and follow step 4 onwards above.安装完成后,您将在WordPress信息中心的左侧导航栏中看到该插件,然后执行上述第4步。
More details and download: (https://wordpress.org/plugins/genesis-simple-edits/)
更多详细信息和下载: ( https://wordpress.org/plugins/genesis-simple-edits/ )
Genesis Connect for WooCommerce (Genesis Connect for WooCommerce)
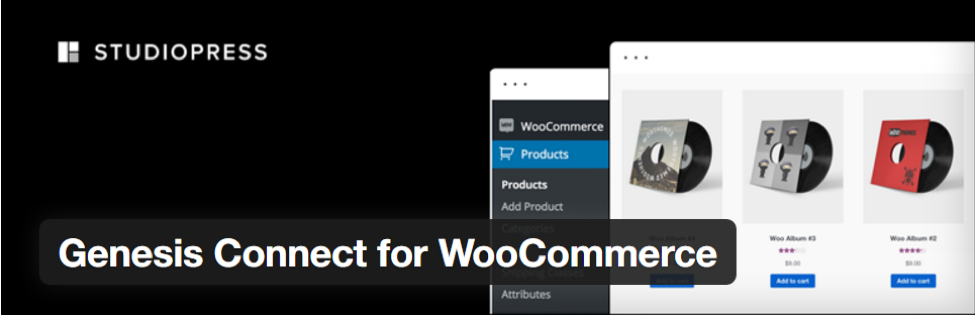
Are you looking for a solution to create an online store using both WooCommerce and Genesis? Well, your search ends with this plugin. Genesis Connect for WooCommerce enables you to incorporate WooCommerce functionality and features in the Genesis child themes and framework. You can easily use customised designs for tag archives, products and their categories, and the main shop pages.
您是否正在寻找使用WooCommerce和Genesis创建在线商店的解决方案? 好吧,您的搜索以此插件结尾。 通过Genesis Connect for WooCommerce,您可以将WooCommerce功能和功能纳入Genesis子主题和框架中。 您可以轻松地将定制设计用于标签档案,产品及其类别以及主要商店页面。
WordPress version required: 3.3 or higher Compatible up to version: 4.6.1 Active Installs: 20,000+
所需的WordPress版本: 3.3或更高版本兼容: 4.6.1 主动安装: 20,000+
主要特点: (Key Features:)
- Makes Genesis Simple Menus and Genesis Simple Sidebars compatible with WooCommerce.使Genesis Simple菜单和Genesis Simple侧栏与WooCommerce兼容。
- Supports customisations that the user can incorporate at the template level, ensuring that none of the changes are lost in the future. 支持用户可以在模板级别合并的自定义,以确保将来不会丢失任何更改。
- Compatible with Genesis, WordPress, and WooCommerce 2.1+ versions.与Genesis,WordPress和WooCommerce 2.1+版本兼容。
- The plugin is available for free and is created by StudioPress developers. 该插件是免费的,由StudioPress开发人员创建。
- Allows you to display product lists and works perfectly with the e-commerce platform.允许您显示产品列表,并与电子商务平台完美配合。
快速教程和安装指南: (Quick Tutorial & Installation Guide:)
手动程序 (Manual Procedure)
Note that before you install this plugin, a Genesis child theme must be activated on the framework and WooCommerce must be installed on your system.
请注意,在安装此插件之前,必须在框架上激活Genesis子主题,并且必须在系统上安装WooCommerce。
- Open /wp-content/plugins/ directory and upload the contents of the Genesis-connect-WooCommerce folder.打开/ wp-content / plugins /目录,然后上载Genesis-connect-WooCommerce文件夹的内容。
- 2.Make sure that you don’t change the folder’s name.2.确保不更改文件夹的名称。
- 3.Go to the Plugins menu in WordPress to activate the plugin.3.转到WordPress中的插件菜单以激活插件。
- 4.Add the code add_theme_support( ‘genesis-connect-woocommerce’ ); to the functions.php file of the Genesis child theme.4.添加代码add_theme_support('genesis-connect-woocommerce'); 到Genesis子主题的functions.php文件中。
- 5.Check whether the new templates are working properly on your shop pages.5.检查新模板在您的商店页面上是否正常运行。
通过WordPress安装: (Install via WordPress:)
- Dashboard > Plugin > Add New.资讯主页>外挂程式>新增。
- Search for Genesis Connect for WooCommerce in the search bar.在搜索栏中搜索Genesis Connect for WooCommerce。
- Install and activate it.安装并激活它。
- Once it’s installed, you’ll see the plugin in the left navigation bar of WordPress Dashboard.安装完成后,您将在WordPress仪表板的左侧导航栏中看到该插件。
More details and download: (https://wordpress.org/plugins/genesis-connect-woocommerce/)
更多详细信息和下载:( https://wordpress.org/plugins/genesis-connect-woocommerce/ )
创世纪的布局 (Genesis Layout Extras)
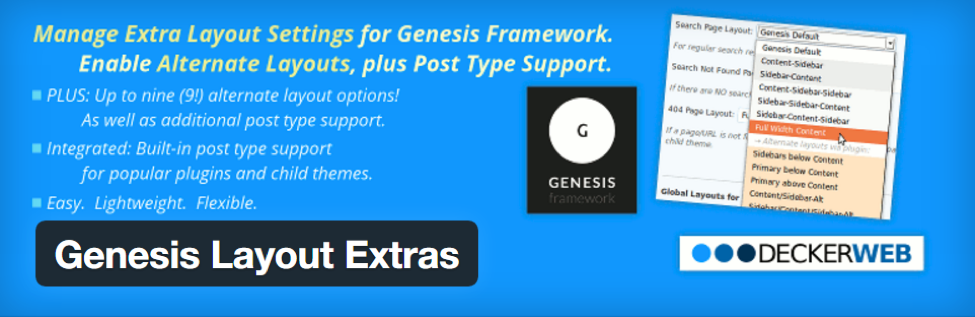
Genesis Framework somewhat lacks in the variety of page layouts, which is why installing the Genesis Layout Extra plugin is the best option for adding extra layouts. It’s a very lightweight plugin, that enables you to easily change and modify default layouts for archive sections, singular pages, search results pages, homepage, attachment pages, author pages, and the 404 pages. You can give the website a completely new look by selecting creative layouts from a wide range of options for the aforementioned pages.
Genesis Framework在某种程度上缺乏页面布局,这就是为什么安装Genesis Layout Extra插件是添加额外布局的最佳选择的原因。 这是一个非常轻巧的插件,使您可以轻松地更改和修改存档部分,单个页面,搜索结果页面,主页,附件页面,作者页面和404页面的默认布局。 您可以通过从上述页面的众多选项中选择创意版式,使网站焕然一新。
WordPress version required: 3.4 plus Genesis 1.8+ or higher Compatible up to version: 4.6.1 Active Installs: 10,000+
所需WordPress版本: 3.4以及Genesis 1.8+或更高版本兼容版本: 4.6.1 主动安装: 10,000+
主要特点: (Key Features:)
- Up to 9 new layouts.多达9种新布局。
- Modify default layouts for homepage, search, attachment, various archive, and 404 pages. 修改主页,搜索,附件,各种存档和404页面的默认布局。
- Layouts available for posts that are created by other plugins in the framework or other third-party authors.布局可用于由框架中的其他插件或其他第三方作者创建的帖子。
- Layout settings for the Genesis compatible bbPress 2.x forum plugin as a bonus feature.兼容Genesis的bbPress 2.x论坛插件的布局设置作为一项附加功能。
快速教程和安装指南: (Quick Tutorial & Installation Guide:)
手动程序 (Manual Procedure)
Note that the Genesis Layout Extra plugin is only compatible with the parent theme of Genesis Framework (GPL-2.0+)
请注意,Genesis Layout Extra插件仅与Genesis Framework(GPL-2.0 +)的父主题兼容。
- Open /wp-content/plugins/ directory and upload the contents of the Genesis-featured-page-extras folder.打开/ wp-content / plugins /目录,并上传Genesis-featured-page-extras文件夹的内容。
- Make sure that you don’t change the folder’s name.确保不更改文件夹的名称。
- Go to the Plugins menu in WordPress to activate the plugin.转到WordPress中的“插件”菜单以激活插件。
- Make changes to the default layout by going to the Genesis Theme Settings menu on the left-hand and selecting Layout Extras.通过转到左侧的Genesis Theme Settings菜单并选择Layout Extras,对默认布局进行更改。
通过WordPress安装: (Install via WordPress:)
- Dashboard > Plugin > Add New.资讯主页>外挂程式>新增。
- Search for Genesis Layout Extra in the search bar.在搜索栏中搜索Genesis Layout Extra。
- Install and activate it.安装并激活它。
- Make changes to the default layout by going to the Genesis Theme Settings menu on the left-hand and selecting Layout Extras.通过转到左侧的Genesis Theme Settings菜单并选择Layout Extras,对默认布局进行更改。
More details and download: (https://wordpress.org/plugins/genesis-layout-extras/)
更多详细信息和下载: ( https://wordpress.org/plugins/genesis-layout-extras/ )
创世纪视觉挂钩指南 (Genesis Visual Hook Guide)
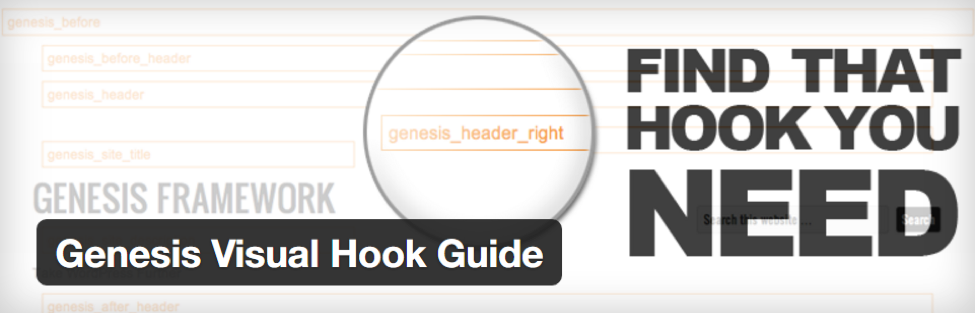
Do you want to customise the Genesis child theme exactly the way you want it to be?
您是否要完全按照自己的方式自定义Genesis子主题?
Genesis Visual Hook Guide allows you to locate the Genesis filter, markup and action hooks in the current child theme easily and quickly.
Genesis Visual Hook指南可让您轻松快捷地在当前子主题中找到Genesis过滤器,标记和动作钩子。
WordPress version required: 3.4 or higher Compatible up to version: 4.1.13 Active Installs: 10,000+
所需的WordPress版本: 3.4或更高版本兼容: 4.1.13 有效安装次数: 10,000+
主要特点: (Key Features:)
- Works great with Genesis Simple Hooks.与Genesis Simple Hooks配合使用非常好。
- A drop-down menu is added in the admin bar once the plugin is installed to allow the user to select from the three hook options, and find their location.安装插件后,将在管理栏中添加一个下拉菜单,以允许用户从三个挂钩选项中进行选择并找到其位置。
快速教程和安装指南: (Quick Tutorial & Installation Guide:)
手动程序 (Manual Procedure)
Open
/wp-content/plugins/directory and upload the contents of the Genesis-visual-hook-guide folder.打开
/wp-content/plugins/目录,然后上载Genesis-visual-hook-guide文件夹的内容。- Make sure that you don’t change the folder’s name.确保不更改文件夹的名称。
- Go to the Plugins menu in WordPress to activate the plugin.转到WordPress中的“插件”菜单以激活插件。
通过WordPress安装: (Install via WordPress:)
- Dashboard > Plugin > Add New.资讯主页>外挂程式>新增。
- Search for Genesis Simple Hooks in the search bar.在搜索栏中搜索“ Genesis Simple Hooks”。
- Install and activate it.安装并激活它。
- Once it’s installed, you’ll see the plugin in the left navigation bar of WordPress Dashboard under Genesis.安装完成后,您将在Genesis下的WordPress仪表板的左侧导航栏中看到该插件。
More details and download: (https://wordpress.org/plugins/genesis-visual-hook-guide/)
更多详细信息和下载: ( https://wordpress.org/plugins/genesis-visual-hook-guide/ )
结语 (Wrapping Up)
So there you have it, these are some of the best plugins for Genesis powered websites. You can easily use a combination (or all of them) for customising Genesis based projects and greatly enhance the user experience.
因此,有了这些,这些都是Genesis支持的网站的最佳插件。 您可以轻松地使用组合(或所有组合)来自定义基于Genesis的项目,并极大地增强用户体验。
If you have any other Genesis plugins that you use in your builds, please share them with us in the comments below.
如果您在构建中使用其他Genesis插件,请在下面的评论中与我们分享。
翻译自: https://www.sitepoint.com/genesis-framework-plugins-to-enhance-your-wordpress-website/
genesis脚本
genesis脚本_Genesis Framework插件可增强您的WordPress网站相关推荐
- wordpress加速插件_12个插件来加速您的WordPress网站
每个人都喜欢快速加载的网站(也包括您和您的读者),因此,您当然已经知道网站加载速度会影响用户体验. 在本文中,我们不会进一步说服您为什么您需要一个更快的WordPress网站 ,或者与您分享如何编辑P ...
- PCB Genesis脚本 C#调用Javascript
曾经用node.js测试写Genesis脚本失败了,这次借助开发PCB规则引擎的机会(基于JS V8引擎与.net深度交互性), 验证一下Javascript是否可用于写Genesis脚本. 一.测试 ...
- java写genesis脚本,PCB Genesis脚本 C#调用Python
在PCB行业,Genesis的二次开发的编程脚本越来越丰富了啊,从一开始进入眼界的Genesis脚本语言是很少的,CSH,PERL, 再后来慢慢发展,VB,易语言,VB.NET,C#,Java,TCL ...
- Genesis脚本---自动输出Gberber274格式资料 脚本
Genesis脚本-自动输出Gberber274格式资料 脚本 # !/bin/csh set GUI_CMD = $GENESIS_DIR/tmp/gui_cmd.$$ set GUI_RESP = ...
- VR Interaction Framework插件的使用
随着VR技术越来越成熟,Unity版本的不断更新,SteamVR和VRTK等旧版本插件不再完美适配最新版本的Unity编辑器,编辑器和插件经常各种报错,推荐使用VRIF进行VR开发,该框架可以轻松创建 ...
- python脚本制作—大漠插件: MoveTo指令鼠标不移动
python脚本制作-大漠插件: MoveTo指令鼠标不移动 问题提出: 在pycharm中使用大漠对象中的MoveTo命令移动鼠标,鼠标不移动. 问题解决: 重启电脑后自己不知道为什么就好了,就这么 ...
- 导入php插件_漏洞分析丨WordPress评论插件wpDiscuz任意文件上传
本文共 791 字,预计阅读时间 4 分钟 首发于 『先知社区』 在T00ls上看到一个老哥WordPress站点被搞了,下载了Access日志分析了一下,发现攻击路径是先访问了一个页面,然后访问 / ...
- wordpress会员插件_最好的免费WordPress会员插件
wordpress会员插件 WordPress is an incredibly versatile CMS. You can use it to launch a blog, an online s ...
- WordPress网站利用WP2PCS-SY插件定时、增量网站备份至百度网盘
WordPress网站利用WP2PCS-SY插件定时.增量网站备份至百度网盘 如果我们有做过网站,如果我们做过网站丢过数据,那肯定体会到网站数据是多么重要.如果我们够勤奋,可以定期手工备份数据到本地: ...
最新文章
- 深度学习(二)theano学习笔记(1)环境搭建
- Unity MMORPG游戏优化经验分享
- webgl获取鼠标形状_三模无线搭配对称手型设计,游戏致胜利器,ROG烈刃2无线鼠标...
- (进阶篇)Redis6.2.0 集群 主从复制_原理剖析_02
- C#中Invoke 和 BeginInvoke 的区别
- redis-cluster
- java 值传递 引用传递_Java小白进阶之值传递-引用传递
- NSDate的简单用法
- 最新cuDNN 7[Linux]百度云下载[免费] 适用于CUDA 10.0
- 3dmax 计算机中丢失,3dmax材质丢失怎么快速找回-解决3dmax材质不见了的方法 - 河东软件园...
- 初探华尔街期权量化交易的奥秘
- 嵌入式系统开发与应用——Linux系统Socket网络编程
- mysql 5.7.20免安装_Windows下MySQL 5.7.20 免安装版配置
- 【干货】ubuntu18.04+win7双系统+双硬盘安装总结
- 使用ElementUi的tabs切换组件时下拉选择器出现破板情况
- Django的数据库创建、连接与迁移
- 流媒体服务器主板型号怎么看,玩转NAS 篇五:双2.5G接口+J4125处理器,对于NAS意味着什么?威联通453Dmini对比453Bmini...
- 第2章 感知机 - 对偶形式
- 用python判断闰年
- HDU6581 Vacation (HDU2019多校第一场1004)
热门文章
- java web 拍卖系统_基于jsp的拍卖系统-JavaEE实现拍卖系统 - java项目源码
- canvas学习day2——对象版帧动画,小人原地行走踏步,drawimage,根据按键控制小人走动,三目运算符
- 亚马逊服务器 修改密钥对,更改ec2实例的密钥对
- Windows下AV1代码配置过程
- 基于51单片机的简易电子计算器——有温度显示和万年历等额外功能
- 计算机术语ap,各种计算机术语KVM
- C#:光标通过上下键或者enter键从一个textBox移动到另一个textBox或实现按键click功能
- PowerPoint是一种什么软件
- OpenCV入门(十一):感兴趣区域提取
- go orm框架对比