springmvc-实现增删改查
![]()
30. 尚硅谷_佟刚_SpringMVC_RESTRUL_CRUD_显示所有员工信息.avi现在需要使用restful风格实现增删改查,需要将post风格的请求转换成PUT 请求和DELETE 请求 1. 需要在web.xml文件中配置 HiddenHttpMethodFilter <!-- 配置 org.springframework.web.filter.HiddenHttpMethodFilter: 可以把 POST 请求转为 DELETE 或 POST 请求 --><filter><filter-name>HiddenHttpMethodFilter</filter-name><filter-class>org.springframework.web.filter.HiddenHttpMethodFilter</filter-class></filter><filter-mapping><filter-name>HiddenHttpMethodFilter</filter-name><url-pattern>/*</url-pattern></filter-mapping>2. 需要发送 POST 请求3. 需要在发送 POST 请求时携带一个 name="_method" 的隐藏域, 值为 DELETE 或 PUT我们来看下web.xml的具体配置
<?xml version="1.0" encoding="UTF-8"?>
<web-app xmlns:xsi="http://www.w3.org/2001/XMLSchema-instance"xmlns="http://java.sun.com/xml/ns/javaee"xsi:schemaLocation="http://java.sun.com/xml/ns/javaee http://java.sun.com/xml/ns/javaee/web-app_3_0.xsd"version="3.0" ><!-- The front controller of this Spring Web application, responsible for handling all application requests --><!-- 配置 org.springframework.web.filter.HiddenHttpMethodFilter: 可以把 POST 请求转为 DELETE 或 POST 请求 --><filter><filter-name>HiddenHttpMethodFilter</filter-name><filter-class>org.springframework.web.filter.HiddenHttpMethodFilter</filter-class></filter><filter-mapping><filter-name>HiddenHttpMethodFilter</filter-name><url-pattern>/*</url-pattern></filter-mapping><servlet><servlet-name>springDispatcherServlet</servlet-name><servlet-class>org.springframework.web.servlet.DispatcherServlet</servlet-class><!-- 加载spirng配置文件 --><init-param><param-name>contextConfigLocation</param-name><param-value>classpath:spring-mvc.xml</param-value></init-param><!-- 启动就加载 --><load-on-startup>1</load-on-startup></servlet><!-- 拦截所有请求 --><servlet-mapping><servlet-name>springDispatcherServlet</servlet-name><url-pattern>/</url-pattern></servlet-mapping>
</web-app>
1.3. 效果
① 通过POST 请求增加员工信息
② 通过PUT 请求修改员工信息
③ 通过DELETE 请求删除员工信息
④ 通过GET 请求 获取所有的 员工信息
![]()
注意点1;
<!-- springmvc只能使用原声的jstl标签,导入c标签 -->
<%@ taglib prefix="c" uri="http://java.sun.com/jsp/jstl/core" %>
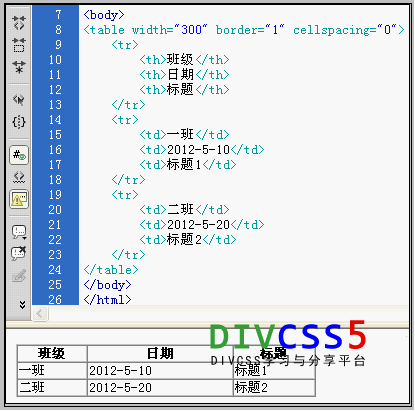
Table tr td th表格使用案例
<table width="300" border="1" cellspacing="0"> <tr> <th>班级</th> <th>日期</th> <th>标题</th> </tr> <tr> <td>一班</td> <td>2012-5-10</td> <td>标题1</td> </tr> <tr> <td>二班</td> <td>2012-5-20</td> <td>标题2</td> </tr>
</table>
DW软件里截图:
table案例教程布局截图
我们来看整个项目的工程如下所示:
![]()
![]()
代码如下:
DepartmentDao
package com.ibigsea.springmvc.dao;import java.util.Collection;
import java.util.HashMap;
import java.util.Map;import org.springframework.stereotype.Component;import com.ibigsea.springmvc.model.Department;@Component
public class DepartmentDao {public static Map<Integer, Department> depts = new HashMap<Integer, Department>();/*** 初始化部门信息*/static {depts.put(101, new Department(101,"JAVA"));depts.put(102, new Department(102,".NET"));depts.put(103, new Department(103,"PHP"));depts.put(104, new Department(104,"C"));}/*** 获取所有的部门信息* @return*/public Collection<Department> getAll(){return depts.values();}/*** 根据ID获取部门信息* @param id* @return*/public Department getDepartmentById(Integer id){return depts.get(id);}}
EmployeeDao
package com.ibigsea.springmvc.dao;import java.util.Collection;
import java.util.HashMap;
import java.util.Map;import org.springframework.beans.factory.annotation.Autowired;
import org.springframework.stereotype.Component;import com.ibigsea.springmvc.model.Department;
import com.ibigsea.springmvc.model.Employee;@Component
public class EmployeeDao {@AutowiredDepartmentDao departmentDao;private static Map<Integer,Employee> emps = new HashMap<Integer, Employee>();/*** 初始化员工信息*/static {emps.put(1001, new Employee(1001,"AA","AA@ibigsea.com",0,new Department(101, "JAVA")));emps.put(1002, new Employee(1002,"BB","BB@ibigsea.com",0,new Department(102, ".NET")));emps.put(1003, new Employee(1003,"CC","CC@ibigsea.com",1,new Department(103, "PHP")));emps.put(1004, new Employee(1004,"DD","DD@ibigsea.com",0,new Department(104, "C")));}private static int employeeId = 1005;/*** 保存员工信息* @param emp*/public void save(Employee emp){if (emp.getId() == null) {emp.setId(employeeId++);}emp.setDepartment(departmentDao.getDepartmentById(emp.getDepartment().getId()));emps.put(emp.getId(), emp);}/*** 获取所有的员工信息* @return*/public Collection<Employee> getAll(){return emps.values();}/*** 根据ID获取员工信息* @param id* @return*/public Employee getEmpById(Integer id){return emps.get(id);}/*** 根据ID删除员工信息* @param id*/public void delEmpById(Integer id){emps.remove(id);}}
index.jsp
<%@ page language="java" import="java.util.*" pageEncoding="UTF-8"%>
<%
String path = request.getContextPath();
String basePath = request.getScheme()+"://"+request.getServerName()+":"+request.getServerPort()+path+"/";
%><!DOCTYPE HTML PUBLIC "-//W3C//DTD HTML 4.01 Transitional//EN">
<html><head><base href="<%=basePath%>"><title>My JSP 'index.jsp' starting page</title><meta http-equiv="pragma" content="no-cache"><meta http-equiv="cache-control" content="no-cache"><meta http-equiv="expires" content="0">    <meta http-equiv="keywords" content="keyword1,keyword2,keyword3"><meta http-equiv="description" content="This is my page"><!--<link rel="stylesheet" type="text/css" href="styles.css">--></head><body><a href="emps">查询所有员工的信息</a> <br></body>
</html>
显示所有员工信息的list.jsp
<%@ page language="java" contentType="text/html; charset=UTF-8"pageEncoding="UTF-8"%>
<%@ taglib uri="http://java.sun.com/jsp/jstl/core" prefix="c" %>
<!DOCTYPE html PUBLIC "-//W3C//DTD HTML 4.01 Transitional//EN" "http://www.w3.org/TR/html4/loose.dtd">
<html>
<head>
<meta http-equiv="Content-Type" content="text/html; charset=UTF-8">
<title>员工信息</title>
</head>
<body><c:if test="${ empty employees }">没有员工信息</c:if><c:if test="${ !empty employees }"><table border="1" bordercolor="black" cellspacing="0"><tr><td width="40px">id</td><td width="30px">name</td><td width="80px">email</td><td width="30px">sex</td><td width="30px">department</td><td width="40px">编辑</td><td width="40px">删除</td></tr><c:forEach items="${employees }" var="emp"><tr><td>${emp.id }</tdemployees><td>${emp.name }</td><td>${emp.email }</td><td>${emp.sex == 0 ? '男' : '女'}</td><td>${emp.department.name}</td><td><a href="${pageContext.request.contextPath}/edit/${emp.id }">Edit</a></td><td><form action="${pageContext.request.contextPath}/delete/${emp.id }" method="post"><input type="hidden" name="_method" value="DELETE"><input type="submit" value="Delete"></form></td></tr></c:forEach></table></c:if><br><br><a href="${pageContext.request.contextPath}/emp">添加员工</a>
</body>
</html>
handle处理器
package com.ibigsea.springmvc.handler;import java.util.Collection;
import java.util.Map;import org.springframework.beans.factory.annotation.Autowired;
import org.springframework.stereotype.Controller;
import org.springframework.web.bind.annotation.RequestMapping;
import org.springframework.web.bind.annotation.RequestMethod;import com.ibigsea.springmvc.dao.EmployeeDao;
import com.ibigsea.springmvc.model.Employee;@Controller
public class EmployeeHandler {@Autowiredprivate EmployeeDao employeeDao;/** 查询所有的员工信息* */@RequestMapping(value="/emps",method=RequestMethod.GET)public String listAllEmployees(Map<String,Object> map){Collection<Employee> allEmployees = employeeDao.getAll();map.put("employees", allEmployees);return"list";}}
web.xml配置文件
<?xml version="1.0" encoding="UTF-8"?>
<web-app xmlns:xsi="http://www.w3.org/2001/XMLSchema-instance"xmlns="http://java.sun.com/xml/ns/javaee"xsi:schemaLocation="http://java.sun.com/xml/ns/javaee http://java.sun.com/xml/ns/javaee/web-app_3_0.xsd"version="3.0" ><filter><filter-name>HiddenHttpMethodFilter</filter-name><filter-class>org.springframework.web.filter.HiddenHttpMethodFilter</filter-class></filter><filter-mapping><filter-name>HiddenHttpMethodFilter</filter-name><url-pattern>/*</url-pattern></filter-mapping><servlet><servlet-name>springDispatcherServlet</servlet-name><servlet-class>org.springframework.web.servlet.DispatcherServlet</servlet-class><!-- 加载spirng配置文件 --><init-param><param-name>contextConfigLocation</param-name><param-value>classpath:spring-mvc.xml</param-value></init-param><!-- 启动就加载 --><load-on-startup>1</load-on-startup></servlet><!-- 拦截所有请求 --><servlet-mapping><servlet-name>springDispatcherServlet</servlet-name><url-pattern>/</url-pattern></servlet-mapping>
</web-app>
spring-mvc.xml
<?xml version="1.0" encoding="UTF-8"?>
<beans xmlns="http://www.springframework.org/schema/beans"xmlns:xsi="http://www.w3.org/2001/XMLSchema-instance"xmlns:context="http://www.springframework.org/schema/context"xmlns:mvc="http://www.springframework.org/schema/mvc"xsi:schemaLocation="http://www.springframework.org/schema/mvc http://www.springframework.org/schema/mvc/spring-mvc-4.1.xsdhttp://www.springframework.org/schema/beans http://www.springframework.org/schema/beans/spring-beans.xsdhttp://www.springframework.org/schema/context http://www.springframework.org/schema/context/spring-context-4.1.xsd"><!-- 配置自动扫描包  扫描com.ibigsea.springmvc 包下的类,后期会使用spring进行管理 --><context:component-scan base-package="com.ibigsea.springmvc"/>
<!-- 配置视图解析器 如返回helloworld     为 [/WEB-INF/pages/helloworld.jsp] --><bean class="org.springframework.web.servlet.view.InternalResourceViewResolver"><!-- 前缀 --><property name="prefix" value="/WEB-INF/pages/"/><!-- 后缀 --><property name="suffix" value=".jsp"/></bean></beans>
项目有几个地方需要注意的:
1、在DepartMentdao 需要使用spring的@AutoWier功能,需要使用@Component进行注解
2、在spring-xml中需要添加自动扫描 <context:component-scan base-package="com.ibigsea.springmvc"/>
运行效果如下所述
![]()
31. 尚硅谷_佟刚_SpringMVC_RESTRUL_CRUD_添加操作&表单标签.avi
![]()
1、这里在添加员工的时候使用的是springmvc的表单标签
正式介绍SpringMVC的表单标签之前,我们需要先在JSP中声明使用的标签,具体做法是在JSP文件的顶部加入以下指令:
<%@taglib uri="http://www.springframework.org/tags/form" prefix="form" %>
2、
1.用form select标签为例,在书写JSP时,有时笔误可能会写成<form:select path="departmet" items="departments" itemLabel="departmentName" itemValue="id"></form:select>
这种写法是错误的,应该是
<form:select path="departmet" items="${departments }" itemLabel="departmentName" itemValue="id"></form:select>
3、
使用Spring的form标签主要有两个作用,第一是它会自动的绑定来自Model中的一个属性值到当前form对应的实体对象,默认是command对象 ,这样我们就可以在form表单体里面方便的使用该对象的属性了;
第二是它支持我们在提交表单的时候使用除GET和POST之外的其他方法进行提交,包括DELETE和PUT等。
现在我们在input.jsp中
<%@page import="java.util.Map"%>
<%@page import="java.util.HashMap"%>
<%@ page language="java" contentType="text/html; charset=UTF-8"pageEncoding="UTF-8"%><%@taglib uri="http://www.springframework.org/tags/form" prefix="form" %>
<!DOCTYPE html PUBLIC "-//W3C//DTD HTML 4.01 Transitional//EN" "http://www.w3.org/TR/html4/loose.dtd">
<html>
<head>
<meta http-equiv="Content-Type" content="text/html; charset=UTF-8">
<title>添加员工信息</title>
</head>
<body>
<!-- 这里是使用springmvc的form标签private Integer id;private String name;private String email;private int sex;private Department department;-->
<form:form action="addEmp" method="post" modelAttribute="employ" >id:<form:input path="id"/><br><br> 姓名:<form:input path="name"/><br>  邮箱:<form:input path="email"/><br> <%Map<String,String> genders = new HashMap();genders.put("1", "男");genders.put("0", "女");  request.setAttribute("sexMap",genders);%>性别:<form:radiobuttons path="sex" items="${sexMap }"/>
<br> department: <form:select path="department.id" itemLabel="name"items="${departments}" itemValue="id"></form:select><br> <input type="submit" value="submit"/>
</form:form>
</body>
</html>
我们需要绑定的域对象不在是默认的command对象,二是表单标签在不进行数据绑定是无法操作的,在运行程序的时候会报错,因为表单标签是依赖于数据绑定操作的。"employ" 对于的employ对象,该对象来自handle中map.put("employ", employee);对象,如果form表达中没有对于的对象进行绑定,form表单
就会抛出异常,所以在使用springmvc 表单中即使不显示任何数据,也要创建下面这样一个空的employee对象,这样显示表单标签才不会异常。如果employee对象中存在name值,email值,跳转到input.jsp页面的时候会把对应的值显示出来,该功能可以用于修改联系人,把联系人原来的信息显示在表单标签中。
总结:表单标签在不进行数据绑定是无法操作的,在运行程序的时候会报错,因为表单标签是依赖于数据绑定操作的。绑定对象可以使用modelAttribute制定需要绑定对象的名称,<form:form action="addEmp" method="post" modelAttribute="employ" >这个配置相当的关键,指定springmvc表单和那个对象就是自动绑定,
@RequestMapping(value="/emp",method=RequestMethod.GET)public String input(Map<String,Object> map){Collection<Department> departments = departmentDao.getAll();map.put("departments", departments);Employee employee = new Employee();map.put("employ", employee);return"input";}4、在添加联系人的页面中,提交的部门的时候
department: <form:select path="department.id" itemLabel="name"
items="${departments}" itemValue="id"></form:select>
<br>
对于的path是department.id,对应的是部门的id,保存的时候依据部门的id值,查询出部门,再把部门保存到联系人中
/*** 保存员工信息* @param emp*/public void save(Employee emp){if (emp.getId() == null) {emp.setId(employeeId++);}emp.setDepartment(departmentDao.getDepartmentById(emp.getDepartment().getId()));emps.put(emp.getId(), emp);}handler控制成的代码为
package com.ibigsea.springmvc.handler;import java.util.Collection;
import java.util.Map;import org.springframework.beans.factory.annotation.Autowired;
import org.springframework.stereotype.Controller;
import org.springframework.web.bind.annotation.ModelAttribute;
import org.springframework.web.bind.annotation.RequestMapping;
import org.springframework.web.bind.annotation.RequestMethod;
import org.springframework.web.bind.annotation.RequestParam;import com.ibigsea.springmvc.dao.DepartmentDao;
import com.ibigsea.springmvc.dao.EmployeeDao;
import com.ibigsea.springmvc.model.Department;
import com.ibigsea.springmvc.model.Employee;@Controller
public class EmployeeHandler {@Autowiredprivate EmployeeDao employeeDao;@Autowiredprivate DepartmentDao departmentDao;/** 执行添加联系人操作,重定向到显示所有联系人的页面* */@RequestMapping(value="/addEmp", method=RequestMethod.POST)public String addEmp(Employee em){employeeDao.save(em);//employeeDao.save(employ);return "redirect:/emps";}/*** 点击添加联系人,跳转到添加联系人页面* */@RequestMapping(value="/emp",method=RequestMethod.GET)public String input(Map<String,Object> map){Collection<Department> departments = departmentDao.getAll();map.put("departments", departments);Employee employee = new Employee();map.put("employ", employee);return"input";}/** 查询所有的员工信息* */@RequestMapping(value="/emps",method=RequestMethod.GET)public String listAllEmployees(Map<String,Object> map){Collection<Employee> allEmployees = employeeDao.getAll();map.put("employees", allEmployees);return"list";}}
添加联系人可以总结成下面的三个步骤:
第一档点击添加联系人按钮的时候,请求经过handle处理跳转到handle进行处理,handle返回添加联系人的页面
添加联系人的页面使用到了spring mvc的表单标签,为了便于数据的回显,这里设置了一个modelAttribute="employ",所以在handle中跳转到添加联系人界面input.jsp的时候都必须在请求域中设置一个空的employ对象,否则会抛出异常
map.put("departments", departments);Employee employee = new Employee();map.put("employ", employee);第三步:添加联系人成功之后,重定向到url为emps的handle进行处理,再次查询出数据库中的所有数据,然后跳转到list.jsp将所有的数据显示出来
32. 尚硅谷_佟刚_SpringMVC_RESTRUL_CRUD_删除操作&处理静态资源.avi
删除操作需要使用HiddenHttpMethodFilter将post请求转化成对应的delete请求,其中表达中的name值必须是_method,vale值必须是DELETE
下面的这种方式
<td><a id="sub123" href="${pageContext.request.contextPath}/delete/${emp.id }" >Delete</a></td>
对应的是get请求,我们如何将get请求转化成post请求了,可以使用下面的方式,也可以采用视频中的方式
<td><form action="${pageContext.request.contextPath}/delete/${emp.id }" method="post"><input type="hidden" name="_method" value="DELETE"><input type="submit" value="Delete"></form></td>我们来看list.jsp的代码
<%@ page language="java" contentType="text/html; charset=UTF-8"pageEncoding="UTF-8"%>
<%@ taglib uri="http://java.sun.com/jsp/jstl/core" prefix="c" %>
<!DOCTYPE html PUBLIC "-//W3C//DTD HTML 4.01 Transitional//EN" "http://www.w3.org/TR/html4/loose.dtd">
<html>
<head>
<meta http-equiv="Content-Type" content="text/html; charset=UTF-8">
<!-- 因为jquery文件 -->
<script type="text/javascript" src="/jquery-3.3.1.min.js"></script>
<script type="text/javascript"></script>
<title>员工信息</title>
</head>
<body><!-- 添加一个表单将post请求转换成delete请求 name必须是_methodvalue必须是DELETE名字不能被修改--></form><c:if test="${ empty employees }">没有员工信息</c:if><c:if test="${ !empty employees }"><table border="1" bordercolor="black" cellspacing="0"><tr><td width="40px">id</td><td width="30px">name</td><td width="80px">email</td><td width="30px">sex</td><td width="30px">department</td><td width="40px">编辑</td><td width="40px">删除</td></tr><c:forEach items="${employees }" var="emp"><tr><td>${emp.id }</tdemployees><td>${emp.name }</td><td>${emp.email }</td><td>${emp.sex == 0 ? '男' : '女'}</td><td>${emp.department.name}</td><td><a href="${pageContext.request.contextPath}/edit/${emp.id }">Edit</a></td><td><form action="${pageContext.request.contextPath}/delete/${emp.id }" method="post"><input type="hidden" name="_method" value="DELETE"><input type="submit" value="Delete"></form></td></tr></c:forEach></table></c:if><br><br><a href="${pageContext.request.contextPath}/emp">添加员工</a>
</body>
</html>
我们来看handler的代码
package com.ibigsea.springmvc.handler;import java.util.Collection;
import java.util.Map;import org.springframework.beans.factory.annotation.Autowired;
import org.springframework.stereotype.Controller;
import org.springframework.web.bind.annotation.ModelAttribute;
import org.springframework.web.bind.annotation.PathVariable;
import org.springframework.web.bind.annotation.RequestMapping;
import org.springframework.web.bind.annotation.RequestMethod;
import org.springframework.web.bind.annotation.RequestParam;import com.ibigsea.springmvc.dao.DepartmentDao;
import com.ibigsea.springmvc.dao.EmployeeDao;
import com.ibigsea.springmvc.model.Department;
import com.ibigsea.springmvc.model.Employee;@Controller
public class EmployeeHandler {@Autowiredprivate EmployeeDao employeeDao;@Autowiredprivate DepartmentDao departmentDao;/** 执行添加联系人操作,重定向到显示所有联系人的页面* */@RequestMapping(value="/delete/{id}", method=RequestMethod.DELETE)public String deletEmp(@PathVariable("id") Integer id ){employeeDao.delEmpById(id);//employeeDao.save(employ);return "redirect:/emps";}/** 执行添加联系人操作,重定向到显示所有联系人的页面* */@RequestMapping(value="/addEmp", method=RequestMethod.POST)public String addEmp(Employee em){employeeDao.save(em);return "redirect:/emps";}/*** 点击添加联系人,跳转到添加联系人页面* */@RequestMapping(value="/emp",method=RequestMethod.GET)public String input(Map<String,Object> map){Collection<Department> departments = departmentDao.getAll();map.put("departments", departments);Employee employee = new Employee();map.put("employ", employee);return"input";}/** 查询所有的员工信息* */@RequestMapping(value="/emps",method=RequestMethod.GET)public String listAllEmployees(Map<String,Object> map){Collection<Employee> allEmployees = employeeDao.getAll();map.put("employees", allEmployees);return"list";}}
注意点:
在web.xml中配置
<!-- 拦截所有请求 --><servlet-mapping><servlet-name>springDispatcherServlet</servlet-name><url-pattern>/</url-pattern></servlet-mapping>
拦截所以的请求,如果访问静态资源文件也会被拦截。但是对于的访问静态资源的文件没有在handler中进行映射处理,就会导出错误,为了能够直接访问静态资源文件不会出现问题,需要在spring-mvc.xml文件中进行下面的配置
<!-- 配置运行可以访问静态资源文化 --><mvc:default-servlet-handler/><mvc:annotation-driven></mvc:annotation-driven>
spring-mvc.xml的代码如下
<?xml version="1.0" encoding="UTF-8"?>
<beans xmlns="http://www.springframework.org/schema/beans"xmlns:xsi="http://www.w3.org/2001/XMLSchema-instance"xmlns:context="http://www.springframework.org/schema/context"xmlns:mvc="http://www.springframework.org/schema/mvc"xsi:schemaLocation="http://www.springframework.org/schema/mvc http://www.springframework.org/schema/mvc/spring-mvc-4.1.xsdhttp://www.springframework.org/schema/beans http://www.springframework.org/schema/beans/spring-beans.xsdhttp://www.springframework.org/schema/context http://www.springframework.org/schema/context/spring-context-4.1.xsd"><!-- 配置自动扫描包  扫描com.ibigsea.springmvc 包下的类,后期会使用spring进行管理 --><context:component-scan base-package="com.ibigsea.springmvc"/>
<!-- 配置视图解析器 如返回helloworld     为 [/WEB-INF/pages/helloworld.jsp] --><bean class="org.springframework.web.servlet.view.InternalResourceViewResolver"><!-- 前缀 --><property name="prefix" value="/WEB-INF/pages/"/><!-- 后缀 --><property name="suffix" value=".jsp"/></bean><!-- 配置运行可以访问静态资源文化 --><mvc:default-servlet-handler/><mvc:annotation-driven></mvc:annotation-driven></beans>
33. 尚硅谷_佟刚_SpringMVC_RESTRUL_CRUD_修改操作.avi
修改操作
1、在修改页面显示需要修改的联系人,但是联系人的name属性不能被修改
2、修改联系人需要使用PUT方式提交
这里因为要在input.jsp中显示需要修改的联系人,需要对input.jsp做下面的修改
<!-- 注意不能写成
<form:hidden path="_method" value="PUT"/>
1、因为传递参数的时候,需要封装成javabean对象,java对象中不存在_method这个属性,上面的path="id"在javabean对象中存在
2、并且 <form:hidden标签中不存在value属性
只能使用下面的这种形式传递,不能使用form表单的hidden属性传递_method标签
-->
![]()
<c:if test="${ employ.id != null}"><form:hidden path="id"/><input type="hidden" name="_method" value="PUT"/> </c:if>
我们来看下程序的代码
<%@page import="java.util.Map"%>
<%@page import="java.util.HashMap"%>
<%@ page language="java" contentType="text/html; charset=UTF-8"pageEncoding="UTF-8"%><%@taglib uri="http://www.springframework.org/tags/form" prefix="form" %><%@taglib prefix="c" uri="http://java.sun.com/jsp/jstl/core"%>
<!DOCTYPE html PUBLIC "-//W3C//DTD HTML 4.01 Transitional//EN" "http://www.w3.org/TR/html4/loose.dtd">
<html>
<head>
<meta http-equiv="Content-Type" content="text/html; charset=UTF-8">
<title>添加员工信息</title>
</head>
<body>
<!-- 这里是使用springmvc的form标签private Integer id;private String name;private String email;private int sex;private Department department;-->
<form:form action="${pageContext.request.contextPath}/addEmp" method="post" modelAttribute="employ" ><!-- 判断id的值是否存在,如果存在就是修改联系人,不显示id标签 --><!-- 判断id的值是否存在,如果存在就是修改联系人,联系人的name属性不能被修改 --><c:if test="${ employ.id == null}">id:<form:input path="id"/><br><br> 姓名:<form:input path="name"/><br> </c:if><!-- 不等于null,需要将联系人id的值重新传递到handle进行处理
对象中存在id属性,可以直接传递,并且需要将表单的post请求转化成put请求。我们需要传递一个_method属性,对应的value值是PUT传递到handle中--><c:if test="${ employ.id != null}"><form:hidden path="id"/><input type="hidden" name="_method" value="PUT"/> </c:if>邮箱:<form:input path="email"/><br> <%Map<String,String> genders = new HashMap();genders.put("1", "男");genders.put("0", "女");  request.setAttribute("sexMap",genders);%>性别:<form:radiobuttons path="sex" items="${sexMap }"/>
<br> department: <form:select path="department.id" itemLabel="name"items="${departments}" itemValue="id"></form:select><br> <input type="submit" value="submit"/>
</form:form>
</body>
</html>
我们来看下handle层的代码
package com.ibigsea.springmvc.handler;import java.util.Collection;
import java.util.Map;import org.springframework.beans.factory.annotation.Autowired;
import org.springframework.stereotype.Controller;
import org.springframework.web.bind.annotation.ModelAttribute;
import org.springframework.web.bind.annotation.PathVariable;
import org.springframework.web.bind.annotation.RequestMapping;
import org.springframework.web.bind.annotation.RequestMethod;
import org.springframework.web.bind.annotation.RequestParam;import com.ibigsea.springmvc.dao.DepartmentDao;
import com.ibigsea.springmvc.dao.EmployeeDao;
import com.ibigsea.springmvc.model.Department;
import com.ibigsea.springmvc.model.Employee;@Controller
public class EmployeeHandler {@Autowiredprivate EmployeeDao employeeDao;@Autowiredprivate DepartmentDao departmentDao;/*** 点击修改联系人,跳转到修改联系人页面,显示需要修改的联系人信息,其中联系人的名字不能被修改* */@RequestMapping(value="/edit/{id}",method=RequestMethod.GET)public String input(@PathVariable("id") Integer id,Map<String,Object> map){Collection<Department> departments = departmentDao.getAll();map.put("departments", departments);//通过id查找需要修改的联系人Employee employee = employeeDao.getEmpById(id);map.put("employ", employee);return"input";}/*** 这里需要在执行修改联系人在保存的时候先查询出来,否则自己保存*  m is :Employee [id=1002, name=null, email=BB@ibigsea.com, sex=0, department=Department [id=101, name=null]]*  会存在联系人名字为空的情况,修改修改联系人页面没有传递联系人姓名的属性值* */@ModelAttributepublic void getEmployee(@RequestParam(value="id",required = false) Integer id ,Map<String,Object> map){if(id != null){Employee employee = employeeDao.getEmpById(id);//map.put("employ", employee)名字和@ModelAttribute("employ")中的一一对应map.put("employ", employee);}}/**** 保存修改联系人页面,修改的联系人,对应的action是addEmp* <form:form action="addEmp" method="post" modelAttribute="employ" >* 对应的访问方式是对应的访问方式是PUT方式*  <input type="hidden" name="_method" value="PUT"/> *  *  注意点2:*  这里在修改修改联系人的时候,需要被修改联系人的name属性不能被修改*  m is :Employee [id=1002, name=null, email=BB@ibigsea.com, sex=0, department=Department [id=101, name=null]]* */@RequestMapping(value="/addEmp", method=RequestMethod.PUT)public String update(@ModelAttribute("employ")Employee em){System.out.println("em is :"+em.toString());employeeDao.save(em);return "redirect:/emps";}/** 执行添加联系人操作,重定向到显示所有联系人的页面* */@RequestMapping(value="/delete/{id}", method=RequestMethod.DELETE)public String deletEmp(@PathVariable("id") Integer id ){employeeDao.delEmpById(id);//employeeDao.save(employ);return "redirect:/emps";}/** 执行添加联系人操作,重定向到显示所有联系人的页面* */@RequestMapping(value="/addEmp", method=RequestMethod.POST)public String addEmp(Employee em){employeeDao.save(em);return "redirect:/emps";}/*** 点击添加联系人,跳转到添加联系人页面* */@RequestMapping(value="/emp",method=RequestMethod.GET)public String input(Map<String,Object> map){Collection<Department> departments = departmentDao.getAll();map.put("departments", departments);Employee employee = new Employee();map.put("employ", employee);return"input";}/** 查询所有的员工信息* */@RequestMapping(value="/emps",method=RequestMethod.GET)public String listAllEmployees(Map<String,Object> map){Collection<Employee> allEmployees = employeeDao.getAll();map.put("employees", allEmployees);return"list";}}
整个工程的代码下载路径地址是:
https://pan.baidu.com/s/1vP_BYybJnAByqSsp35o3Cg
转载于:https://www.cnblogs.com/kebibuluan/p/8855057.html
springmvc-实现增删改查相关推荐
- springMVC实现增删改查
首先需要准备好一张数据库表我这里用emp这张表:具体代码: 1 /* 2 SQLyog 企业版 - MySQL GUI v8.14 3 MySQL - 5.1.73-community 4 ***** ...
- springboot整合mybatis实现简单的单表增删改查(完整代码可下载)
搭建项目 项目简单效果,前端效果丑的一批,主要是后端功能实现: springboot增删改查 csdn完整代码下载链接: springboot+mybatis Gitee下载地址: Gitee下载地址 ...
- 基于springmvc、ajax,后台连接数据库的增删改查
前言 前段时间在博客园上找了一个springmvc的例子,照着学了一下,算是对springmvc有了一个初步的了解,打一个基础,下面是链接.(我只看了博客,视频太耗时间了) 博客链接:http://w ...
- springMVC操作mongoDB增删改查
下面是mongoDb简单的增删改查(新闻类) 附:query.addCriteria(Criteria.where("modelId").ne("").ne(n ...
- Spring+SpringMVC+MyBatis明日方舟版人员信息管理系统前端页面代码前后端交互+SSM框架 管理员登录 游客登录 普通用户登录 人员的增删改查 信息更新 图片上传 分页查询)
Spring+SpringMVC+MyBatis明日方舟版人员信息管理系统前端页面代码(前后端交互+SSM框架 管理员登录 游客登录 普通用户登录 人员的增删改查 信息更新 图片上传 分页查询 修改密 ...
- Spring+SpringMVC+Mybatis实现增删改查--(五)SSM修改员工页面搭建
Spring+SpringMVC+Mybatis实现增删改查--(五)SSM修改员工页面搭建 修改员工: 1.在index.jsp页面点击"编辑"弹出编辑对话框 2.去数据库查询部 ...
- SpringMVC表单数据增删改查简易梳理(含实例代码)
使用SpringMVC创建表单进行数据的增删改查是javaEE开发的基本功,本人根据自己最近开发的基于jeecms框架的网站平台来梳理数据增删改查的思路. 首先根据所需表单页面设计数据库,定义不同字段 ...
- python增删改查的框架layui_spring+springMvc+mybatis+layui实现数据表格的增删改查(纯layui实现)...
[实例简介] 项目描述: 这是通过ssm+layui 实现的简单的对数据表格的增删改查,所有页面纯由layui实现. 如果你是新手学习layui,那这个绝对会对你有很大的帮助: 如果你之前已经学过甚至 ...
- 基于SpringBoot开发一个Restful服务,实现增删改查功能
点击上方"方志朋",选择"置顶公众号" 技术文章第一时间送达! 作者:虚无境 cnblogs.com/xuwujing/p/8260935.html 前言 在去 ...
- SpringMVC_实现简单的增删改查
实现简单的增删改查 1:创建User的javabean package com.doaoao.bean; public class User {private String name;private ...
最新文章
- IDEA 在线翻译插件
- 有关scanf输入的问题
- lay弹窗库的一个坑
- cocos2d js调用java_【cocos2d-js官方文档】二十四、如何在android平台上使用js直接调用Java方法...
- mysql免安装_腾讯云Ubuntu18.04部置Django2系列(二):Ubuntu18.04 安装Mysql
- 跟我从零基础学习Unity3D开发--NGUI入门基础
- JAVA实现MD5算法、SHA1算法和SHA256算法
- 中国鲆鱼养殖产业呈现集聚趋势,主要集中于山东、辽宁两地「图」
- C语言之数组的正向逆向输出
- 3、在hilens_kit安装ros后,运行小车导航
- mysql 超级用户登录_MySQL超级用户(root)密码忘记重置
- 关于JS如何实现图片闪烁
- 2022年全球市场柠檬酸酯总体规模、主要生产商、主要地区、产品和应用细分研究报告
- Java:StringBuffer
- 11.拼数(c++)
- 欢迎大家体验滴滴Logi-KafkaManager
- 怎么修改服务器文件写入权限,怎么修改服务器本地写入权限设置
- Java基础练习题 1-50
- 使用GPS坐标来计算距离和方位角
- 视频flv怎么转换成mp4格式?